As a new webmaster, maybe it’s a challenge to create the first website. Bisend.com now provides a user-friendly control panel Plesk Onyx and figures out solutions to help webmasters to create website easily and quickly.
To ensure the website work well in our server, usually, you only need several steps including adding domains, uploading files, configuring database and resolving domains. Bellow guide can lead you to create your first website step by step.
Create Website in Plesk Onyx
1. Add Domain.
Log in Plesk Onyx , in the top of Website & Domain page, click Add Domain.

Once fill in the domain name, the document will be created automatically (Document root), where you can upload website data. Usually, the path to the website home directory is httpdocs if it’s the first domain. Otherwise, it will be named as the domain name.

Notice for HTTP & HTTPS:
Some browsers will mark the website as insecure due to there’s no SSL certificate. So, to avoid this, you need set up HTTPS.
Tick ‘SSL/TLS support’ if your website will be installed SSL certificate.
301 redirect from HTTP to HTTPS: This option decides if your website can be visited via both HTTP and HTTPS or only HTTPS.
For other options, you can check them depending on your own requests. Finally, click Apply to save the setting up.
2. Upload Data under Files
Usually, the documents root of first website is httpdocs by default.
Before uploading, check if there are default files and it’s better to remove them.
Then, upload all the files of your website.

3. Add and Import Database
Add database, choose the right database server and related sites as well as allow remote connection if necessary.

Then, click ‘Import Dump’ to import your database.

Finally, refer Connection Info to update database connection string in Web.config.
For instance:
Connection String= “Data Source= .\MSSQLSERVER2012; Integrated Security=False;User ID=myuserid; Password = mypassword; Connect Timeout=15;Encrypt=False;Packet Size=4096”
If your website does not configure with database, please ignore this step.
4. Preview in Plesk Onyx.
After all the files and database uploaded, preview website firstly to check if there is any error.

If the website works well, all the process in Plesk Onyx has been finished.
Domain Resolution
After previewing and confirming that website can work well through Plesk Onyx, next step is domain resolution to ensure that the website works and operates in hosting server.
1. If the NS (name server) is from Bisend.com: ns1.bisend.com and ns2.bisend.com, you can just add DNS records in https://my.bisend.com.

2. If the NS (name server) is from a third-party, you need to contact the NS provider to update the IP address. Our shared IP address is 216.104.43.254.
While, it’s better to use our NS directly since you can manage the DNS and resolve domains by yourself in the future as bellow.
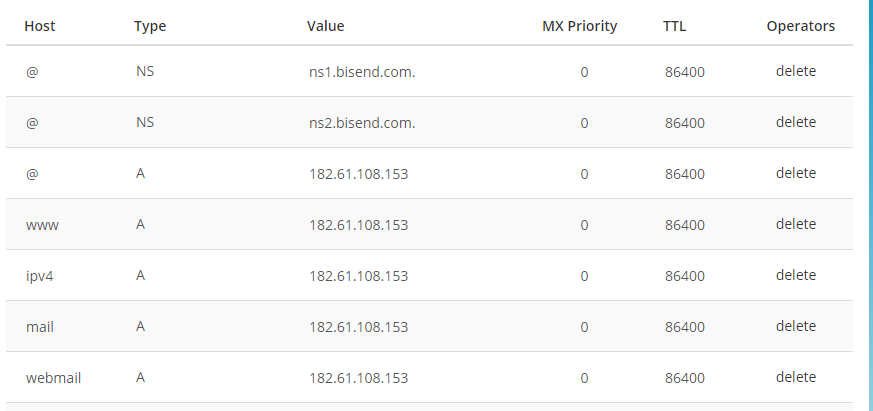
BTW, if you have sub-domains like test.example.com, above methods is also available or you can add A record as below.

Normally, it takes about 24 ~48 hours for the domain to be resolved successfully.
With Plesk Onyx, creating website becomes easy and convenient. If there are any problems in the process, you can contact the online agents or create tickets to ask help. Please visit https://bisend.com to find more information about Bisend.com hosting service while go to https://bisend.com/blog/ for more tutorials about website creation and management.


