With the latest release of Drupal 8, it’s time to take you through the process of upgrading and updating the Drupal point releases. Drupal has successfully started a regular release cycle, which comprises of a major, minor and patch release. So, this tutorial shall help you with the upcoming updates and upgrades as it answers the age-old question – how to upgrade Drupal for Minor and Major changes.
This article will cover:
- How to distinguish between the different types of update
- Methods for updating a minor or patch release
- The standard update procedure
- Drush Update procedure
- Composer Update procedure
- Improving Drupal’s Major Version Upgrade Experience
How to Distinguish Between the Different Types of Update?
This is the easiest and the most important part to understand the type of update as that will decide the changes it might have in the features of your website. The version number of Drupal is made up of three parts. For example, in Drupal’s version 8.2.4 – the first digit stands for the major version, the second digit stands for the minor version, and finally, the third digit stands for the patch level.
The releases are scheduled and you can find new patch releases every monthly, minor version six-monthly, and major release are usually yearly or later. Now talking about the difference, a major upgrade, as the name suggests, usually deals with migration between the releases and can cause major changes to the outlook. The minor releases, which are scheduled to be released after every six months, deal with new experimental modules that add additional functionality. Whereas, the patch releases occur every month with simple bug fixes or security upgrades. Therefore, it is not necessary to update them at once, but if they deal with security, it is better to get updated.
Now, we have been using upgrading and updating term quite often – so, what is the difference between them? A transition between the major versions like between Drupal 6 or Drupal 7 and Drupal 8 will require an upgrade of the site or a migration. Whereas an update means performing an upgrade to smaller undertakings. A major upgrade is quite complex and the process requires a number of different complex steps. Whereas, a minor update or a patch level update revolves around the compatibility of it to the major one is quite simple. So, let’s talk about some of the methods to update the minor changes in Drupal.
Different Methods to Update Minor Changes –
Once you receive a notification of the update, the first thing to do is to read through the release notes along with the updates. These release notes will offer you an overview of all the changes and upgrades included in that specific version. So, if you think after reading the notes that updating is not required, you can go ahead with it. However, if you plan on upgrading the version to the next level, then here is a step-by-step guide that will help you to walk through the process.
#1: Get a fresh backup
Functional Drupal sites are made up of three major components i.e. codes, file, and database. Make sure that you have stored the codebase for the site in the previous versions of Drupal. However, if you haven’t, then storing the codebase should be your first step for updating the minor version.
There are a number of techniques for backing up the files, directories, and the site’s database. You can also use the ‘Backup and Migrate’ module for creating and downloading the backups from the web browser itself. For all the sites running on Drupal 8.3 or lower, you can use Drush 8 to generate a site backup with its archive-dump command. You can run the drush archive-dump from the Drupal 8.3 or lower site and create a SQL file with the database backup of your site. It will contain the entire codebase as well as all the files and directories from your website.
#2: Follow the update procedure.
There are a number of methods for updating the Drupal site; however, we are mentioning only the top three methods for doing so as they are easy and less complicated procedures.
- The Standard Update Procedure
Once you create a backup of the site, you can proceed with the standard procedure.
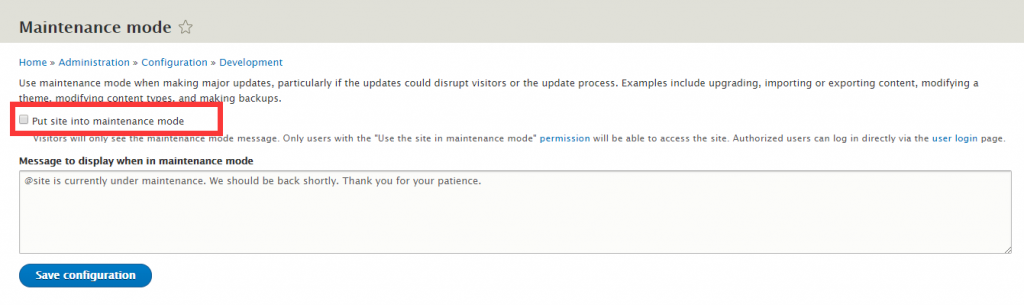
Step 1: Put the site in maintenance mode
Visit Administration > Configuration > Development
or you can also visit admin/config/development/maintenance from the site for switching on the maintenance mode.
Step 2: Remove the old code
Now that your site under maintenance mode, you can update the code as per the new release. Follow the steps on a local development site or a staging site before deploying the same to the live website.
After changing the directories of the Drupal site, remove the code, directories, and any kind of files you have manually added.
rm -rf core vendor
rm -f *.* .*
Step 3: Apply new codes and patches
Now that you have deleted the old codes, replace it with new version Drupal files.
With the new version code in place, now you can reapply all the modifications to these files like robots.txt, .htaccess, composer.json or any other patches you have manually applied. The project typically includes a text file to help you list all such patches or modifications for easy and quick reference during an update.
Step 4: Update the database
You have to allow access for the update.php file, which is blocked by default for security reasons. In the settings.php file, find the update_free_access , and change it to TRUE before saving the file.
After you have allowed access for changes, you can visit it from your browser here yoursite.com/update.php and run the update script.
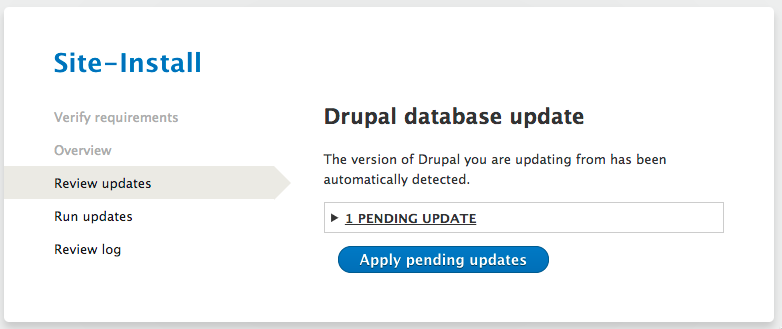
When the update script is done, you’ll be notified that it is updated successfully or has failed due to a series of errors.
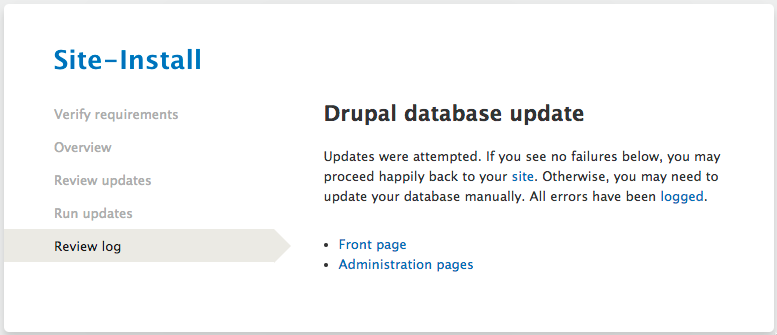
When the update is completed, make sure to change the update_free_access setting again to FALSE for preventing others to access the site’s update.php feature.
$settings[‘update_free_access’] = FALSE;
- Drush 8 Update Procedure
The next method is updating using Drush 8.
We have already mentioned above how you can use the drush archive-dump, for creating a backup of the files, codebase, and database for sites running on Drupal 8.3 or lower.
Here you can also use Drush 8 command also for putting the site into the maintenance mode. (the sset alias works similarly in the Drush 9)
drush sset system.maintenance_mode 1
drush cr
Now, you can update the codes by using two simple commands –
composer update
drush pm-updatecode drupal
Make sure that any of the customization files like robots.txt or .htaccess are created again. Once you are done with the changes, you can carry on with database update by using –
drush updatedb
After you successfully complete the updating, remove the site from the maintenance mode. Then you can build the registry as well as caches again.
drush sset system.maintenance_mode 0
drush cache-rebuild
- Composer Template Update Procedure
Another method to update the Drupal codebase is by using the Drupal Composer Template for managing the codebase. You can use the scaffolding for setting up Composer templates. Once you are done with installing, the project will allow you in managing, adding dependencies, as well as updating.
To update the Drupal codebase, use –
composer update drupal/core webflo/drupal-core-require-dev symfony/* –with-dependencies
Note: Check the project’s notes and the steps to update using the template method. This is important as steps may change depending on the template installed.
This project helps in managing contributed modules and Drupal core. Hence, you should avoid the use of this method with drush pm-update.
This method of updating can also have an impact on any third-party codes you are storing in the repository. So, it is better to have thorough familiarization and recommendation in the project’s README before using this method.
Drupal’s Major Version Upgrade –
Upgrading the Drupal site from Drupal 6 / 7 to Drupal 8 follows a different approach than all the previous versions. When Drupal 6 site was transmitted to Drupal 7, the same database was used and upgraded from old structure to new structure.
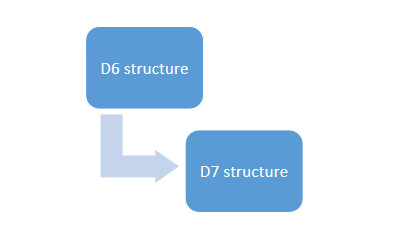
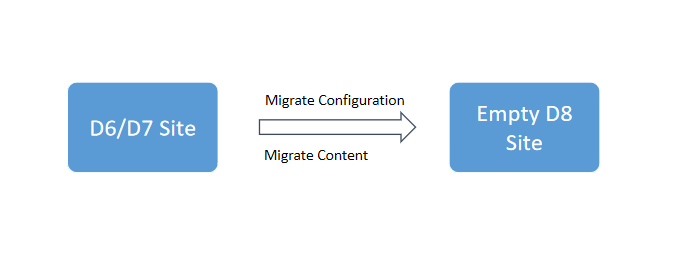
Whereas, when you upgrade a Drupal 6 / 7 website to the latest one, you have to first install a clean Drupal 8 site. After this, you can migrate the site configuration and site content to the new site. Even after migrating to the Drupal 8, your existing Drupal 6 / 7 site will remain completely intact and unaltered.
While migrating from Drupal 6 or Drupal 7 to Drupal 8, the code content types and field definitions will be migrated to the Drupal 8 site, and hence you do not need to create them again in the new site. Similarly, the actual nodes, taxonomy, and users will also be migrated, and hence you do not have to manually copy-paste them to the site.
Even after all these direct migrations, your new site won’t be similar to the old one – thanks to the added, improved features of the Drupal 8 site. However, this may also mean that some of your modules may not have an automated path for upgradation, which may affect the content of your website. Therefore, you need to be careful while migrating the site and the end results. Sometimes, it is a preferred option to manually copy and paste the content for helping it to be intact and true to its nature.


