What is DotNetNuke?
DotNetNuke is one of the largest open source .NET content management systems that empowers over 750,000 websites worldwide. Even non-technical contributors can feel free to add and edit their online presences via a standard web browser. DotNetNuke is business friendly by enabling you to create an approval workflow to ensure nothing hits the public eye until it’s perfect. In the meantime, developers and other tech savvy can harness the power of a selection of third-party modules and the extensible API integrated into the CMS platform.
Advantages of Using DotNetNuke
DotNetNuke comes with a comprehensive set of features that you can benefit from to achieve business objective.
- DotNetNuke is professionally developed by Microsoft therefore having a solid foundation and is well-documented. Written in .NET (C#), the CMS features a powerful web application framework to serve up complex modules.
- DotNetNuke comes with a full extensibility. You can use to create a wide variety of websites, including both one-page startup sites and complex international corporate websites.
- DotNetNuke is highly customizable, which means that you can create appealing blog, forum, portfolio, and small or large business site without having much programming experience. You can also invest third party modules to leverage more sophisticated functionality that is usually seen with a news/magazine or an eCommerce site.
- DotNetNuke is integrated with a multi-user management; namely, you don’t have to jump between multiple systems but manage them from a central console. What’s more, you can create content once and share it across the sites in a Site Group.
- DotNetNuke optimizes your site performance with page and module caching as well as web farms. Being able to deliver faster loading times can vastly improve the user experience. In addition, the CMS software facilitates SEO best practices, such as custom redirects and advanced URL management, helping you gain higher rankings and more search traffic.
- DotNetNuke launches security updates frequently and periodically to maintain a highly secure environment for all hosted sites. And since you are allowed to manage and organize your site’s permissions via user roles, enable reCAPTCHA on registration pages, your risk decreases.
To be fully beneficial for all advantages of DotNetNuke, you are strongly recommended to go with an optimized DotNetNuke hosting service.
Install DotNetNuke from Plesk
Step 1. Create a Microsoft SQL Server Database
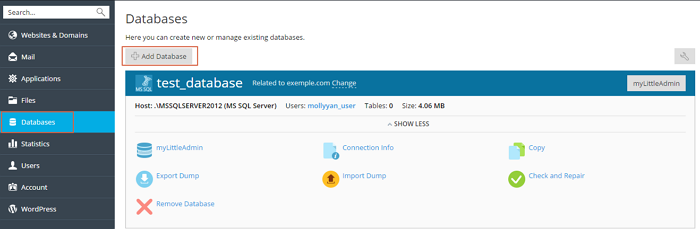
Log into your Plesk control panel, go to the Databases section and click Add Database button on the left.
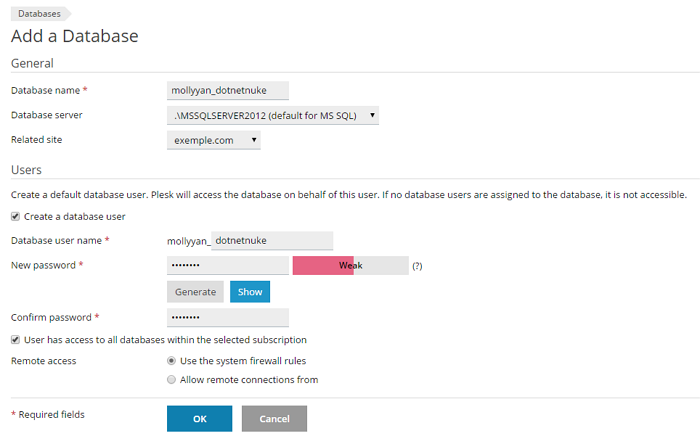
On the next page, you should enter some detailed information about the database, such as Database name, Database server, and Related site. Then scroll down to the Users information, select the checkboxes next to Create a database and User has access to all databases within the selected subscription. After entering the database user details, click on OK button.
Now the database is successfully created. You can return to the Databases section to check it.
Step 2. Install DotNetNuke in Plesk
Plesk offers 1-clcik install for DotNetNuke. There are two installation methods you can choose from: Quick Installation and Custom Installation.
Method #1: Quick installation
When you choose this method, Plesk will automatically install the latest DotNetNuke version for you.
Log into Plesk and go to Applications > All Available Applications page, search for DotNetNuke in the top right search box.
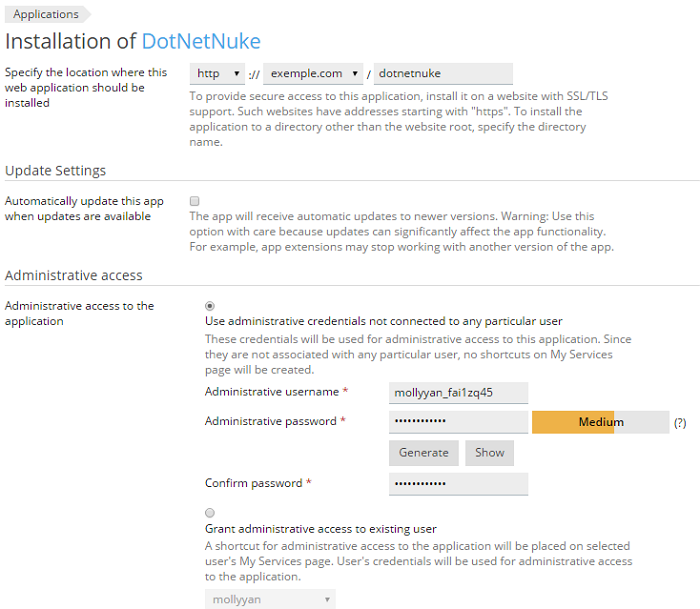
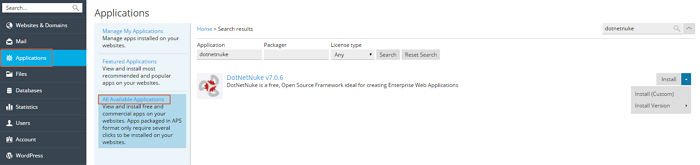 Next to NotNetNuke application, click Install and the Installation of DotNetNuke page appears. You’re required to specify the location of the installed DotNetNuke, set administrative access information, and enter administrator’s preferences. Then click on the Install button to start installing DotNetNuke.
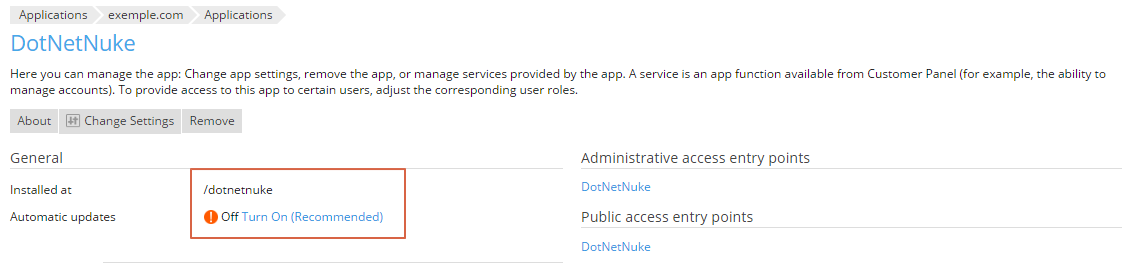
It takes seconds to finish the installation process, after which Plesk displays general information and configuration settings of the application.
Method #2: Custom installation
Custom installation enables you to select the desired DotNetNuke version, set up the administrator user, select auto-update settings, etc.
Log into your Plesk and go to Applications > All Available Applications page, search for DotNetNuke in the top right search box.
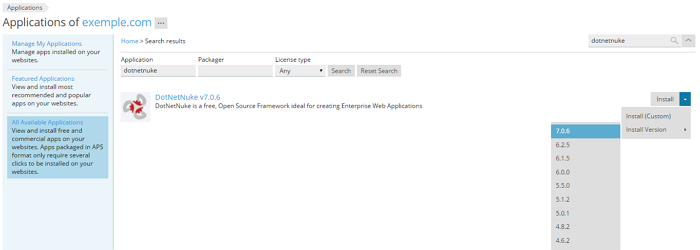
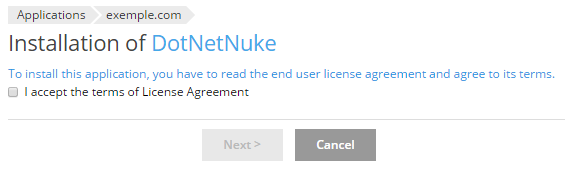
Next to DotNetNuke application, select your favorite version of DotNetNuke and on the next page you need to agree to the Terms of License Agreement. Then, click Next to continue.
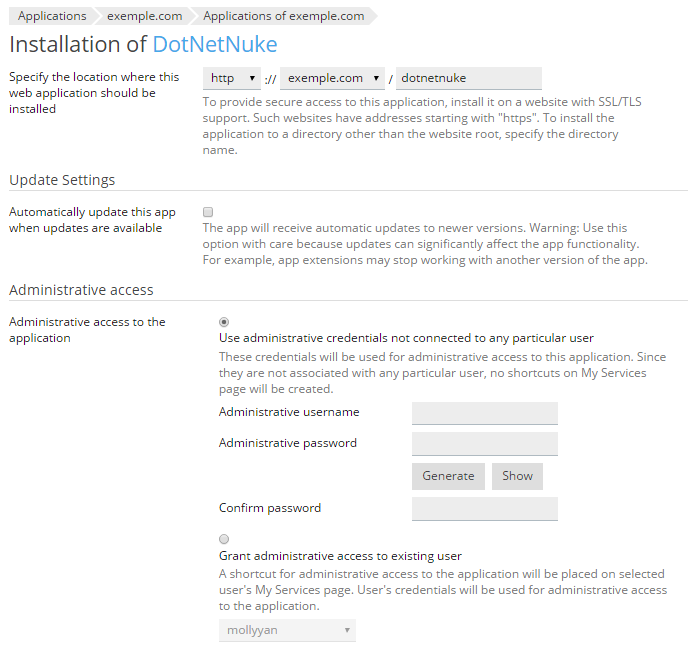
In the Installation of DotNetNuke page, you should specify where you want your web application to be saved and set administrative access information, and enter administrator’s preferences. Then click on the Install button to start installing DotNetNuke.
It takes seconds to finish the installation process, after which Plesk displays general information and configuration settings of the application.
Step 3. Update DotNetNuke Installations
You can update your DotNetNuke installations automatically or manually.
To set up automatic update for your DotNetNuke instance, you can go to Websites & Domains > DotNetNuke, click Turn On (Recommended). If you don’t want Plesk to automatically update your DotNetNuke application, you can keep it turned off.
To manually update DotNetNuke, you can go to the Applications section. If there are updates available, you can find an alert (Update available) under your application and then click it to get detailed information about the new updates. After that, scroll down the page to click on Update Now button.

Before starting your DotNetNuke installation process, please ensure your ASP.NET hosting provider offers 1-click install for DotNetNuke like what we do in our Plesk control panel. Or, you will need to download and upload the installation file to your control panel by yourself.


