What is Kentico?
Founded in 2014, Kentico is an all-inclusive ASP.NET content management system (CMS), eCommerce and online marketing solution for businesses, small and large, both on-premise or in the cloud. With a selection of powerful tools and solutions that are user-friendly, Kentico enables customers and partners to create stunning online presences while easily managing customer experiences in a dynamic business environment.
In the meantime, Kentico is a Microsoft Azure and Gold Certified Partner with offices in the US, UK, Australia and Netherlands. Up to date, the platform has been powering 25,000 websites across the world. Witnessing the great popularity of Kentico CMS, a growing number of ASP.NET hosting providers offer 100% compatibility with Kentico, some even support 1-click installation for the software.
Advantages of Using Kentico CMS
The full-featured ASP.NET CMS comes with an easy-to-editing interface in a browser, giving website owners the freedom to edit their website content anytime and anywhere. It is also worth noting that Kentico requires no technical skills; namely, non-programmers can create and update pages due to the WYSIWYG editor included. In addition to content editing, Kentico CMS makes it possible for website owners to communicate with their visitors or customers through a forum, blog, online form or polls, which is especially helpful for eCommerce sites to grow online sales.
Besides, Kentico CMS is developer friendly. It comes with a powerful framework to deliver the fastest possible experience while enabling you to build any creative websites. You have full control over the CSS styles as well as rendered HTML code, and you can easily integrate your own .NET code or develop custom web parts and modules.
How to Install Kentico CMS?
Step 1. Configure IIS for the Kentico Installation
Before run the Kentico installation file, you should ensure that the IIS Server has been correctly configured for the installation of Kentico. In the case of Kentico 11, your system needs to have the following features enabled:
- Windows Server 2008 R2 SP1: NET, ISAPI Filters, ISAPI Extensions, .NET Extensibility, and Static Content
- Windows Server 2012/2012 R2: NET 4.5, ISAPI Filters, ISAPI Extensions, .NET Extensibility 4.5, and Static Content
- Windows Server 2016: NET 4.6, ISAPI Filters, .NET Extensibility 4.6, and Static Content.
Fortunately, Host4ASP.NET is a Microsoft Golden Partner and we have full commitment to the updated Microsoft technologies. Every Windows hosting plan can meet the latest Kentico 11 system requirements; importantly, you don’t need to manually enable these features for the Kentico Installer because we will provide a ready Kentico hosting environment for you.
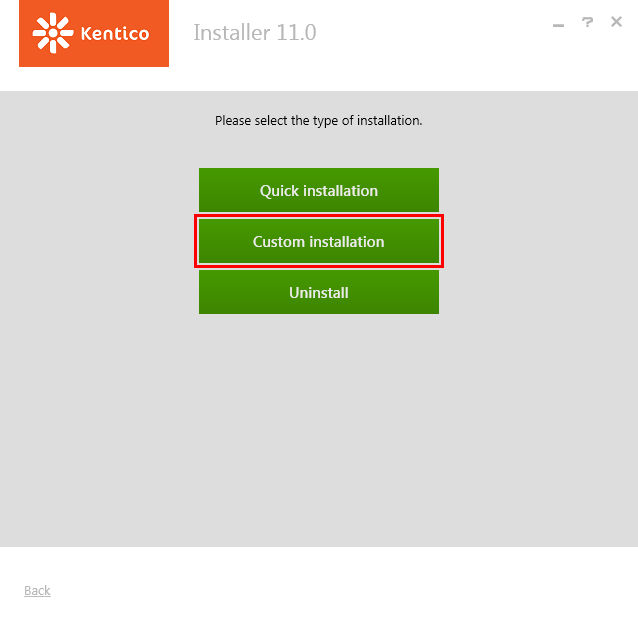
Step 2. Install Kentico for Your Server
There are two options available for you to have Kentico installed on your server: quick installation or custom installation. Usually, we would like to recommend the custom installation because you can customize the settings like installation location, SQL Server, etc. to suit your needs.
How to Create a Kentico Website?
To build a new Kentico website, you can start from installing a blank new site or using a Kentico sample site. In following part, we will describe the detailed steps of the two methods and you can decide to go with either one based on your skills and requirements.
Build a Kentico website from templates
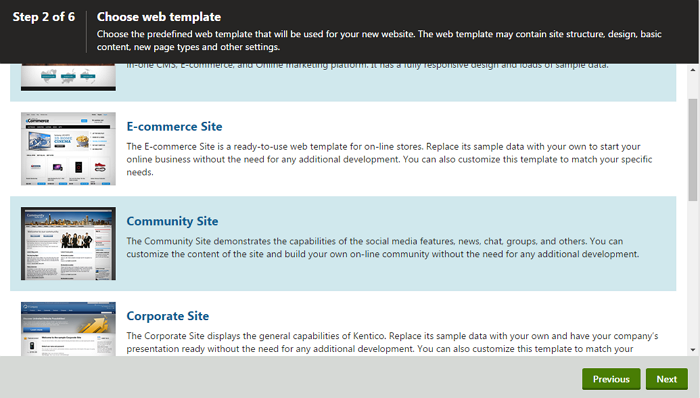
Firstly, you need to start the New site wizard in the Sites application and select Use web template.
Secondly, choose a template from a number of predefined web templates, and click Next.
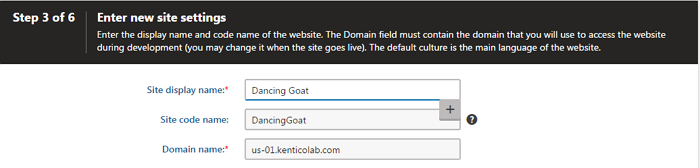
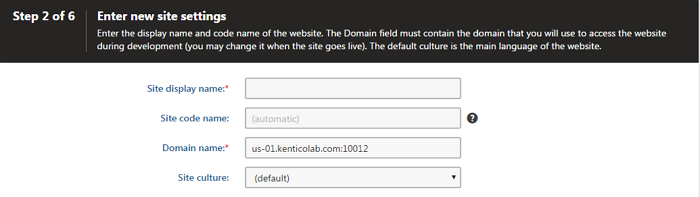
Thirdly, enter the basic site information, including Site display name, Site code name, and Domain name. Then click on Next button.
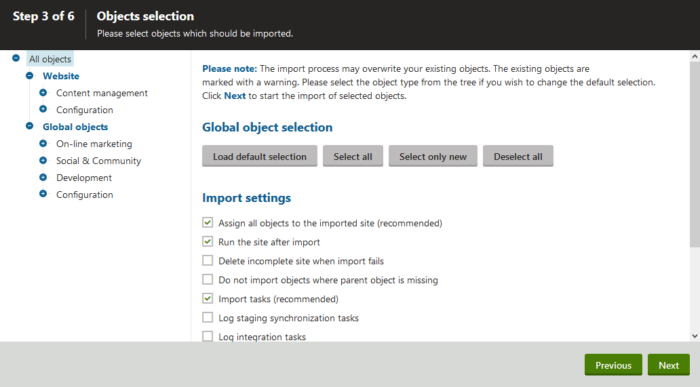
Fourthly, you need to decide what objects you want to import.
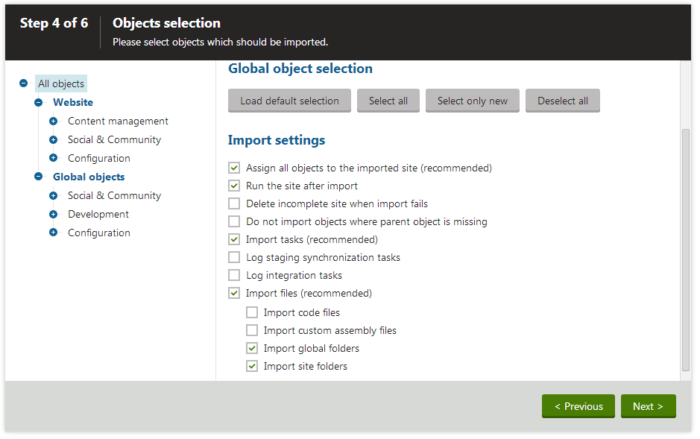
In the root of the tree, you can find following options:
- Load default selection
- Select all objects
- Select only new objects
- Deselect all objects
Then, you can have a selection of import settings, like assign all objects to the imported site, import tasks, import files, and so on.
Fifthly, a log appears and it takes seconds to finish the site creation, after that, click Next to continue.
Last, after the new Kentico website is created, click Finish to return to the Sites application.
Build a Kentico website from scratch
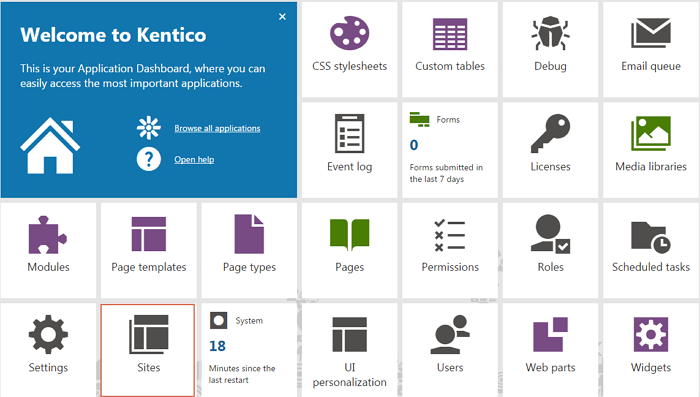
Firstly, log into your Application Dashboard and open the Sites application, then click on the New site wizard button.
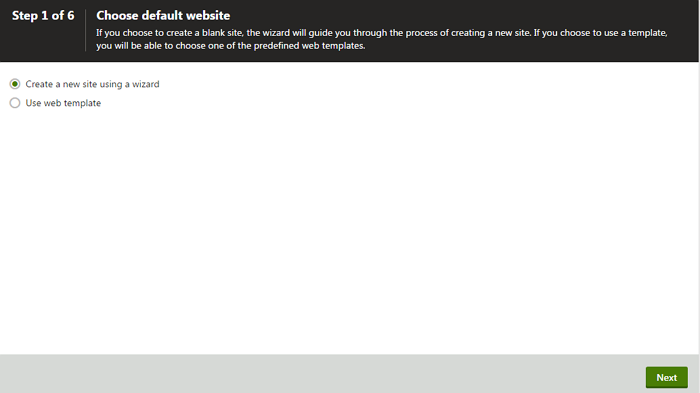
Secondly, click on the New site wizard button, and select Create a new site using a wizard in the next page. Click Next then.
Thirdly, enter information about the new site, including Site display name, Site code name, Domain name, and Site culture. Click Next to continue.
Fourthly, click Next without changing anything.
Fifthly, select Blank master page and click Next.
![]()
Last, click Finish.
A new bland Kentico website is created and displayed in the Sites application section. You can start adding styles to the website according to your business needs.
The installation and creation of a Kentico website is very easy that even a non-programmer can independently build a professional website. If you have any question about getting started your first Kentico website, just contact our support team via live chat, email or ticket system, we stand by around the clock to give instant response to your problems.


